Rebuild instructions for rebuilding a Bosch Fuel Distributor
As with most auto parts It is important not to dismantle the Bosch Fuel distributor more than necessary, unless it is corroded or gummed up inside.
The fuel distributor supplies fuel to the fuel injector.
As most of the time the only part that has failed in the Mercedes fuel injection system is the diaphragm. Tearing it all apart & disturbing all the factory settings is not a good idea unless you have expensive Bosch re calibrating equipment,The most important thing is not to mess with the factory preset mixture screws on the individual ports.After separating the 2 halves you will see the main fueling stem, this should just wriggle loose, & pull out. Remove all the o rings from it & the lower housing. Also if your fd is the later KE unit, pry off the retainer at the bottom of the fueling stem & remove the quad ring. Clean all parts, you can use alcohol, thinner, gasoline, kerosene or the shop safety clean. Avoid using carb cleaner as residues of this tend to destroy the seals in the pressure regulator on the earlier K units.Once everything is clean start to reassemble the unit.Tip #1 When fitting the small o rings to the metering slits, use one of the old o rings from the metering STEM & stretch over all the metering slit rings. This helps to keep them in place when inserting the fueling stem into the head. SEE PICTURE ABOVE.Tip #2 Make sure that the slits on the metering stem line up EXACTLY with the fuel ports inside the head. Its ok to mark the position of one of the ports with a pen. While inserting the fuel stem roll up the old o ring & remove it as soon the stem is firmly seated.Next replace all the cups & springs into the head. Its a good idea to take photos during disassembly, as this helps just in case you forget where something fits when the unit is being put back together, its ok to use a little grease to hold the white plastic plates & steel spring bases on the diaphragm, but only use the smallest amount. When pushing the 2 halves together make sure that you don't trap any of the plastic spring retainers, as this will crack them & may puncture the diaphragm at the same time.All in all its a fairly straight forward procedure, just be patient & gently practice putting the two halves together a couple of times if this is your first rebuild.Also when its back on the motor, remember that you may have to readjust the 3 mm mixture screw on the sensor plate just in front of the fuel distributor if the motor does not start straight away.
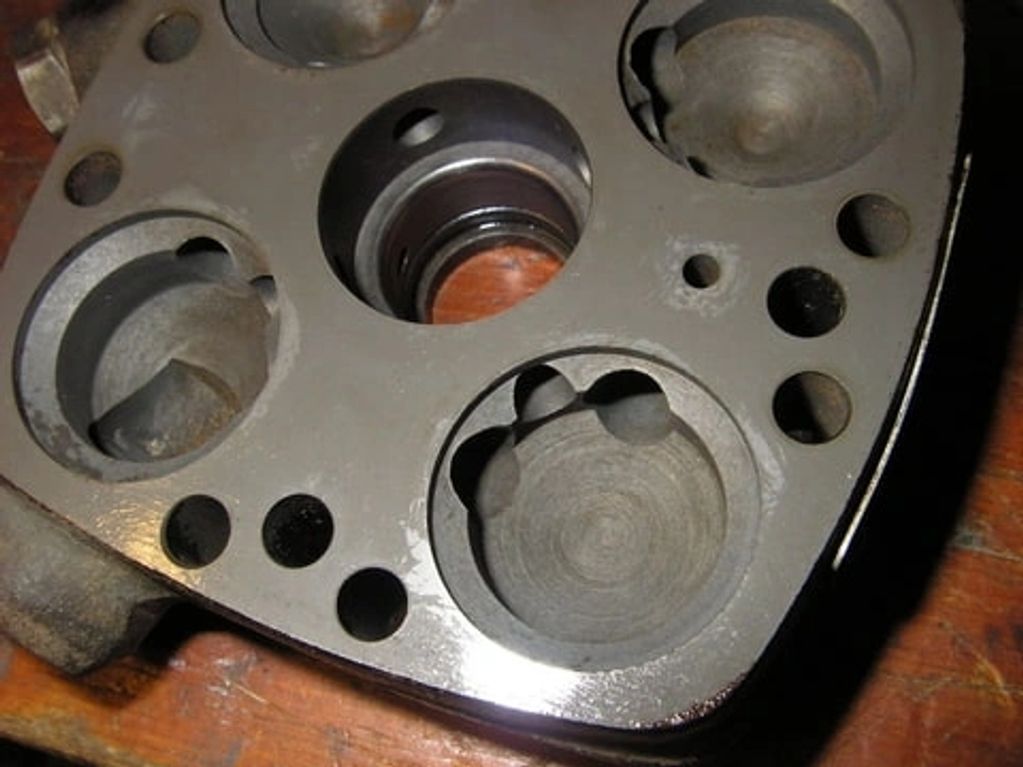
Inside a cast iron fuel distributor

some useful info from one of our customers

I was able to seal my CIS distributor with a loctite theard sealing glue. It's been working flawless since then whitout any leaks.
Sealing was done by applying a minute (really really small) layer of the loctite glue with a pencil to the surfaces of the 2 cast iron parts of the CIS distributor.

Maby some usefull pics for the rebuild


I find 404dollar quit a lot of money , for 30-50euro I buy a used replacement unit which can be made leakproof for 10euro... You don't have to take it appart so far like I did, only seperate the 2 halves and take out the diaphram is sufficient. Clean the surfaces with brake-cleaner and apply the sealant (which is fuel and oil resistant according the the datasheet of loctite, it is made
Copyright © 2023 MCS Automotive Ltd. - All Rights Reserved.
This website uses cookies.
We use cookies to analyze website traffic and optimize your website experience. By accepting our use of cookies, your data will be aggregated with all other user data.